Payments
Initial Payment Manager Screen
Payments are started by clicking on the Dollar icon (top right).
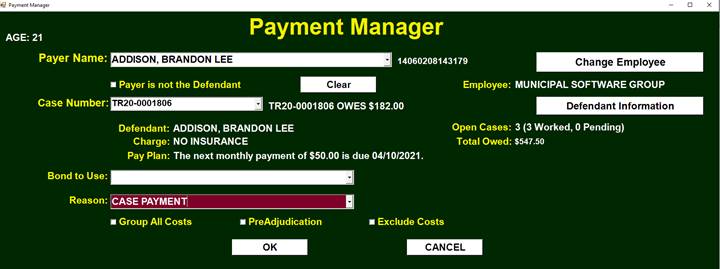
The Initial Payment Manager Screen is displayed with the Name and Case Number defaulted from the previous Case Record.
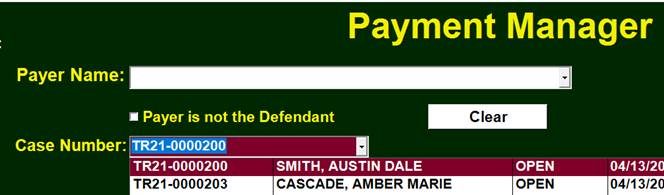
If the Case Number is not correct, another may be selected for this Defendant.
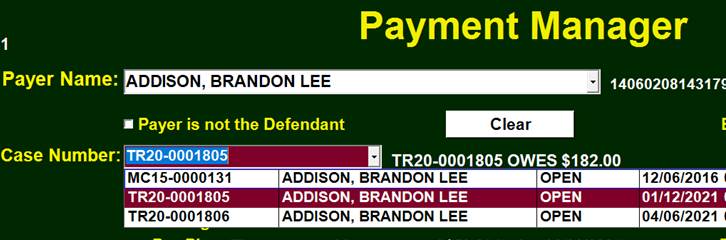
If the Defendant is not correct the ‘Clear’ Button may be pressed.
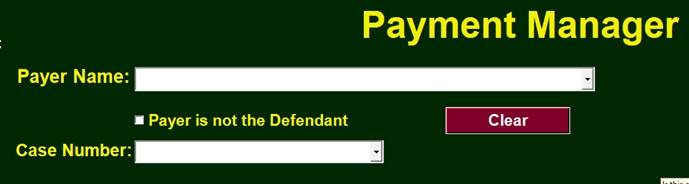
Either a new Case Number or new Defendant may now be selected.
Thus, a payment may be made on any case regardless of the current Case Data Record. However, starting from the correct Case Record means not having to adjust the Payer Name and Case Number.
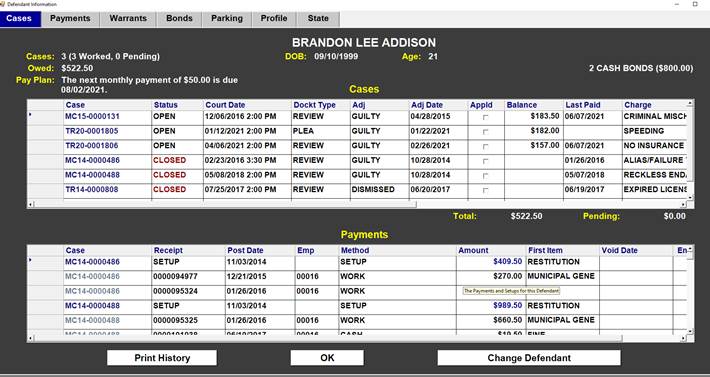
Information about the Selected Defendant and Case Number is displayed in the center of the screen.

Clicking on the ‘Defendant Information’ button will display the Defendant History.
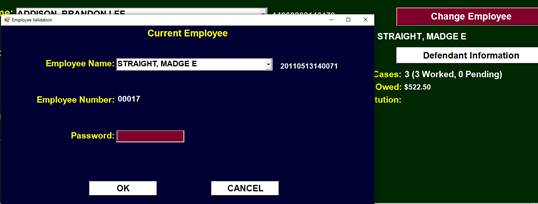
Clicking on the ‘Change Employee’ will allow a different employee name and password to be entered.
Case Payment
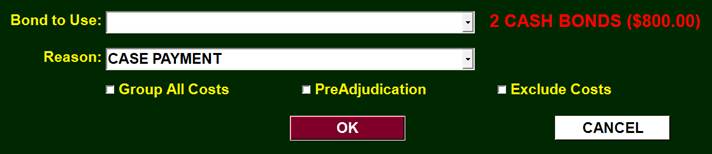
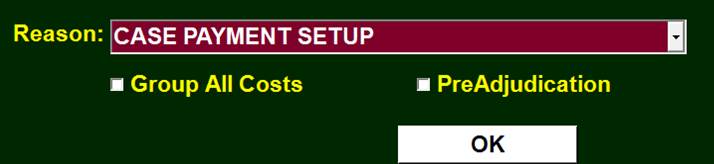
The most common Reason for coming to this Payment Manager Screen is to take a ‘Case Payment’.

The ‘Group All Costs’ check box allows taking one payment on multiple cases for this Defendant at the same time.

The ‘PreAdjudication’ Check Box is for taking payments on this case prior to the case being adjudicated such as a ‘Warrant Fee’.
The ‘Exclude Costs’ Check Box will not setup up the Fines and Costs but instead give an empty Payment Screen.
Clicking OK will display the Case Payment Screen.
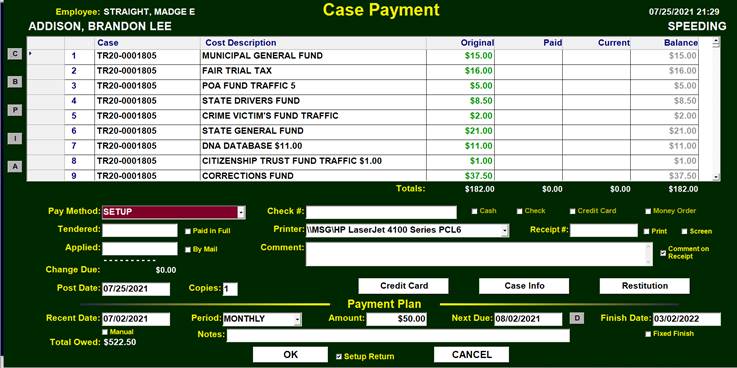
Case Payment Screen
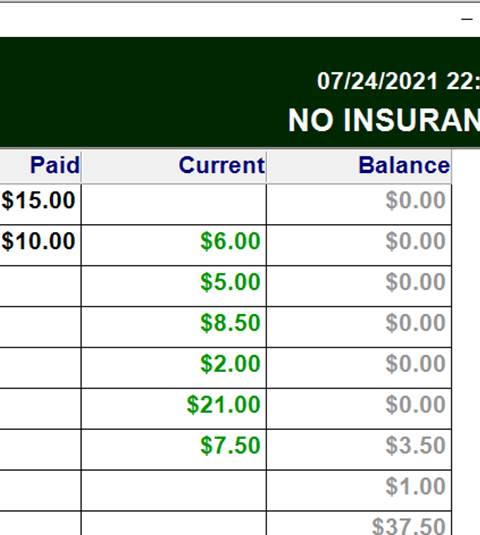
The Fines and Court Costs are shown on the Payment screen.
Original Column shows initial amount.
Paid Column shows previous amounts paid.
Current Column shows amounts currently paying.
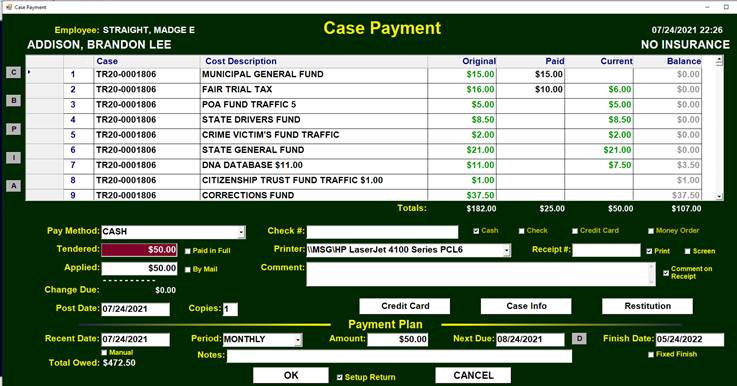
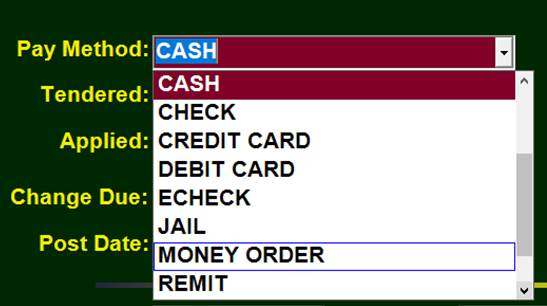
While the default is CASH, there are many different ‘Pay Method’ options.
Once the ‘Tendered’ amount is entered, the ‘Applied’ amount will be populated with the smaller of that amount or the amount actually owed. ‘Change Due’ will also be entered. The ‘Applied’ amount may to be changed to a lesser amount, if appropriate, generating a corresponding ‘Change Due’ amount. The ‘Current’ Column in the Cost Table is also populated from the top down.
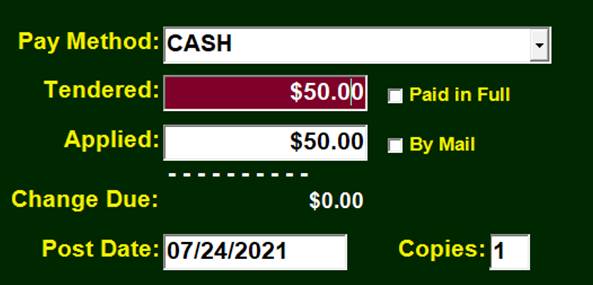
The ‘Paid in Full’ check box use is to force the case is to be closed and considered completed even though there is still a balance. There is no need to check this box if the balance actually is zero.
‘By Mail’ may be optionally checked if it is desired to keep track of where the payment came from.
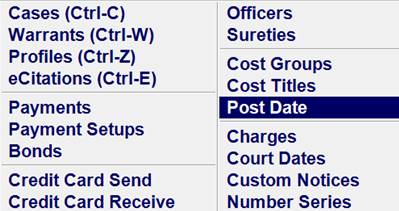
The Current Date is automatically placed in the ‘Post Date’ field, but may be changed if it is desired to be posted to a different date. The current Post Date is automatically changed daily. If the receipts are to be posted to the next business the Post Date may be changed in the Post Date Table.
The ‘Cash’, ‘Check’, ’Credit Card’, or ‘Money Order’ boxes may be automatically checked based on the ‘Pay Method’. They may me manually changed if, for example, a ‘CASH BOND’ was paid by ‘Money Order’.

The Printer will be set to the Default Receipt Printer but may be changed if necessary.
If the ‘Receipt #’ is left blank, the application will generate the next system receipt number. A manual receipt number may be entered which would then have no effect on the next system receipt number.
It is assumed that the receipt will be printed to the receipt printer. If it is desired to see the receipt on the screen first, the ‘Screen’ box should be checked.
A Comment may be entered and then optionally placed on the printed receipt. There are some instances such as a Credit Card authorization that could be automatically placed in the comment field.
Credit Card
Options are available to interface with Credit Card Companies to take payments online or directly through the application by typing in a Credit Card Number, Swiping a Card, or using an EMV Chip Reader.
An amount must be in the Applied field.

Click on the Credit Card Button. Note that the Pay Method does not need to be changed to ‘CREDIT CARD’. This will be automatically handled.

The Credit Card interface screen will appear.
The card should be swiped or manually entered followed by the MMYY expiration date.
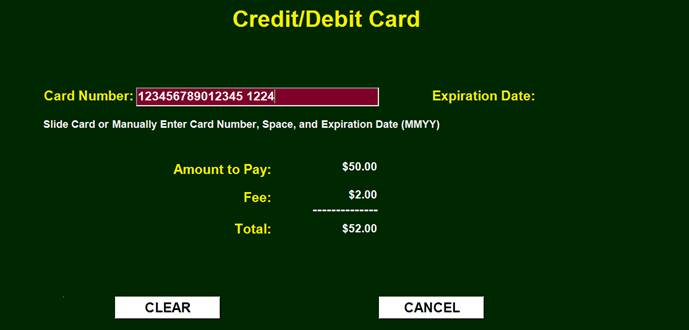
Either an error should be returned or transaction completed by printing out a receipt. A transaction number on the receipt confirms that the charge was made.
Case Info
Choosing the ‘Case Info’ button will display fields from the Case being paid and allow editing of the case data. (Shown below in the Case Payment Setup Section.)

Restitution

If Restitution has been added to the case, clicking on the Restitution button will display the Restitution Manager.

The Payee may be entered so that payments may be tracked when received and demonstrated. (See Restitution for more information.)

Changing Costs in the "Current" Column
As mentioned above, the Current column is populated with the applied amount from the top down. However, this column may be manually changed if it is desired to apply the amounts to different costs.
Also the Current column may have the amounts manually entered prior to entering the ‘Applied’ amount.
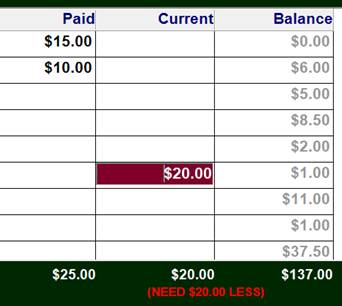
The ‘NEED $20 LESS’ message is saying that the Current column has $20 more than the ‘Applied’ Amount. This message will go away once there is $20 or more in the Applied Amount.
Payment Plan
A Defendant may be placed on a Payment Plan entering the Recent Date (Start Date), the Payment Period (Normally Monthly), and the Payment Amount. The Application will then calculate the ‘Next Due’ Date and the ‘Finish Date’. The Next Due Date may be changed if appropriate. If the Next Due Date should be a Court Date, the ‘D’ button will display upcoming Court Dates.

If a Defendant is to have payment completed by a certain Date, the ‘Fixed Finish’ Box may be checked and the Finish Date entered. The system will then calculate how much would need to be paid monthly (rounded to the nearest $5) to accomplish that goal.

If the ‘Setup Return’ box is checked the application returns to the Initial Payment Manager Screen after either ‘OK’ or ‘CANCEL’ is selected. If ‘Setup Return’ is not checked the application returns back to the original Table (normally the Case Table).

Clicking OK will now produce the Receipt.
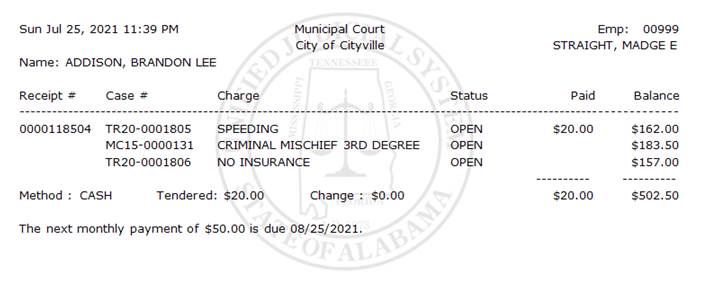
One, Two, or Three receipts may be printed on a single page.
One or Two pages may be printed.
A customized municipality water mark may replace the UJS watermark. Other case balances are listed on the receipt.
The Payment Plan information is printed on the receipt.
Case Payment Setup
A Case Payment Setup is only needed if the case has been adjudicated with at least some costs and the Defendant is not paying anything immediately. If the Defendant is making an initial partial payment, a Case Payment Setup is not needed as that Partial Payment will also create a Payment Setup Record.
Clicking OK will display the Case Disposition Update Form.
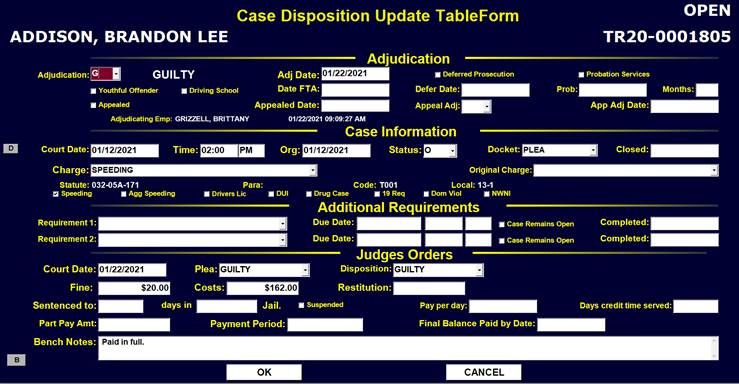
The Adjudication may be entered along with any other appropriate data that will update the underlying Case Data Record. This screen is displayed the first a Case is either Setup or a Payment is made. Clicking ‘OK’ or ‘Cancel’ will display the Case Setup Screen.
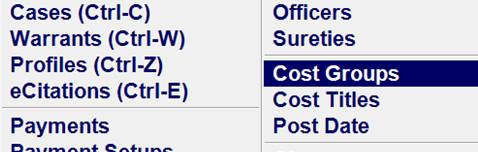
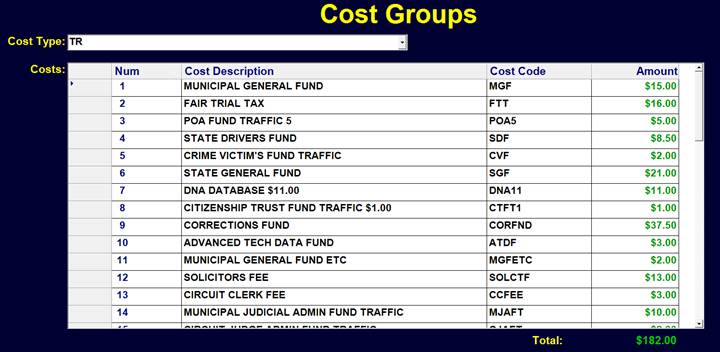
The costs setup are based on criteria of the Charge from the ‘Cost Groups’ Table found in the ‘Quick Table Menu’
Amounts may be adjusted if appropriate on the ‘Case Payment Setup’ Screen. Ctrl-F will display a box to enter the Fine. It may also be entered by adding the cost in the ‘Current’ Column next to Fine.

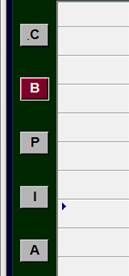
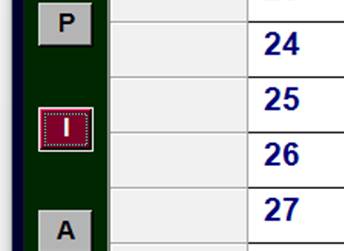
Cost Buttons
Buttons on the Left have various functions to add or adjust the costs.
- ‘C’ will clear all costs
- ‘B’ will add Bail Bond Fees
- ‘P’ will add PreTrial Diversion Costs
- ‘I’ will add Interlock Costs
- ‘A’ will add Additional Customized Costs
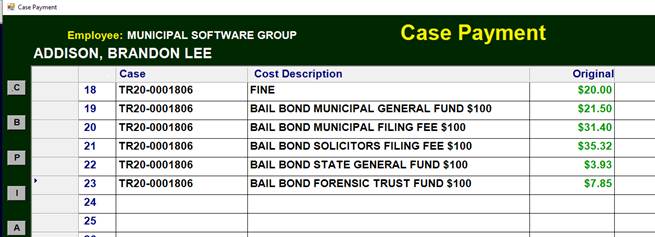
Bail Bond Fee
Clicking on the ‘B’ will display the Bond Fee Amount from which to select the correct Fee Amount.
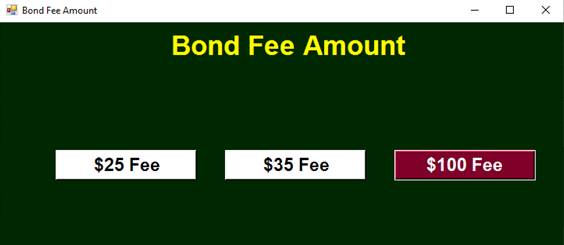
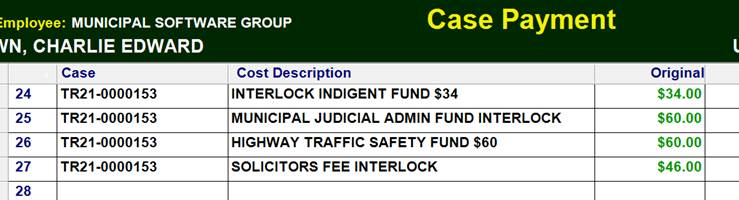
The Appropriate Bail Bond Fee Amounts will be placed at the bottom of the Fines and Costs.
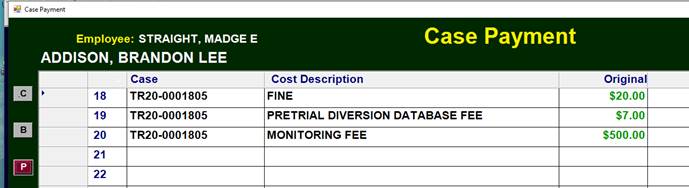
Pretrial Diversion
Clicking on the ‘P’ will bring in the PreTrial Diversion amounts that were previously setup in the aforementioned ‘Cost Group’ Table.

The Pretrial Diversion Costs will be placed at the bottom of the Setup Costs.
Interlock
Interlock Costs should be added upon Setting up a DUI Case when necessary.
Vehicle or No Vehicle need to first be determined.
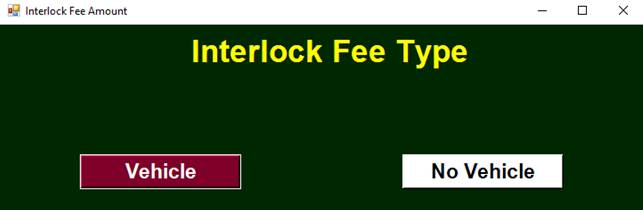
Selecting the Vehicle option will add the one-time costs of $200 to the Setup.
Selecting the ‘No Vehicle’ option will place the Interlock costs for one year on the Setup. Since the number of months may vary from 6 months to up to 3 years for a 3rd Offense DUI, the $900 may need to be adjusted to a range from $450 to $2700.

Monthly Interlock Payments
For ‘No Vehicle’ cases the payments are supposed to be paid at the rate of $75 a month. Normally the total amount owed for Interlock ‘No Vehicle’ is simply totaled and placed after the other court costs. It is then paid in the same way as other court costs.
However, if a Defendant is Setup to pay Interlock on a monthly basis, there is an option on the Initial Payment Manager Screen to select ‘INTERLOCK’ to ensure that the payment does indeed apply towards Interlock and no other costs.
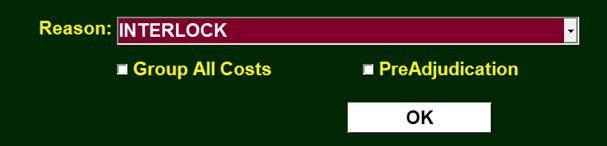
The Amount Tendered and Applied is defaulted to $75 which is taken on the appropriate Interlock Cost.
Driving School Payment
Clicking on the Dollar Icon from a Driving School Record will default the Payment Reason to Driving School.
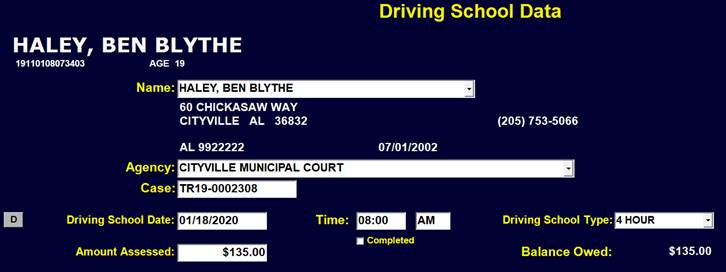
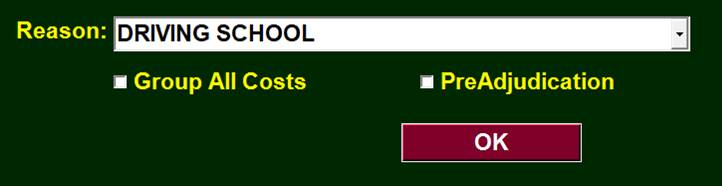
Clicking ‘OK will display the Driving School Payment Screen with information from the Driving School Record.
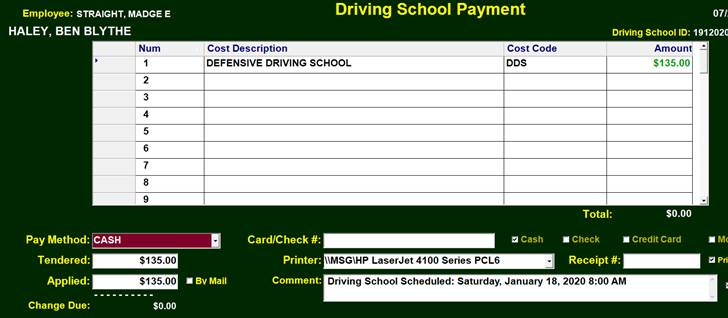
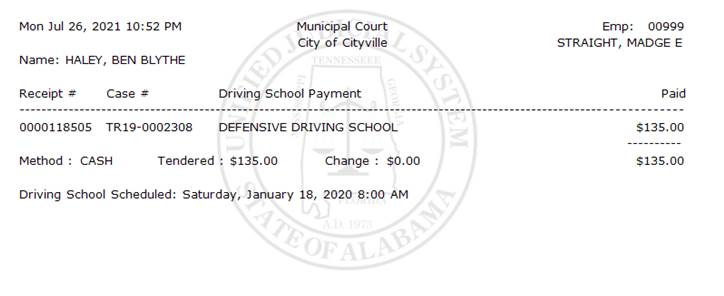
A Receipt is then generated with the Driving School Date and Time.
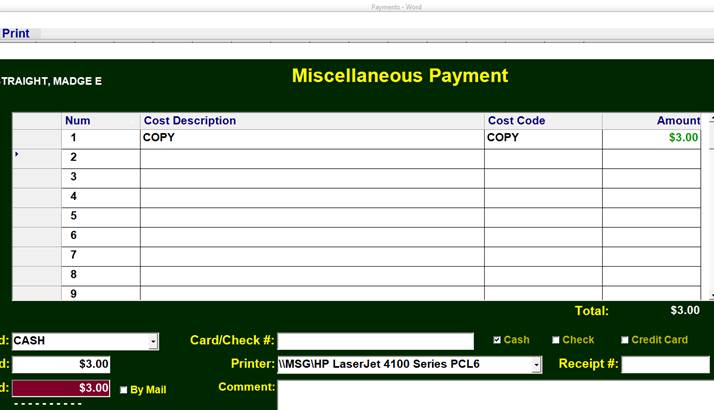
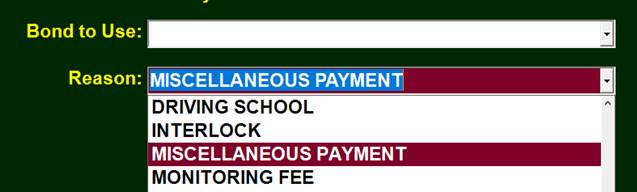
Miscellaneous Payment
A Miscellaneous Payment is one that does not apply directly to a case. A case may or may not be referenced, but the payment does not decrease a case balance.
The Payment Screen initially contains no costs. The appropriate costs and amounts of this Miscellaneous Receipt must be added before putting in the amount tendered and applied.