Cash Bonds
Taking a Cash Bond
Cash Bonds are received through the payment screen.
Cash Bonds may be taken on a particular case or may be taken on a Defendant before a case is entered.
Steps
-
Go to the Case (or Profile) on which the Cash Bond is to be taken and click on the Payment Icon.

The Payment Icon
The Payment Manager screen should now appear.
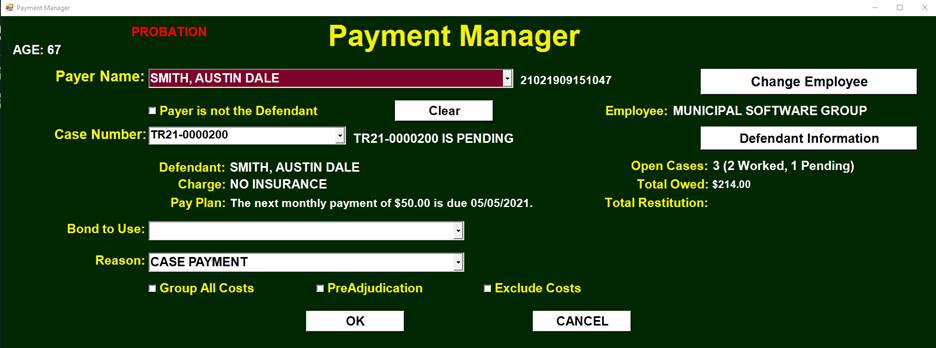
The Payment Manager screen
-
Change the Reason to ‘BOND RECEIVE CASH’.
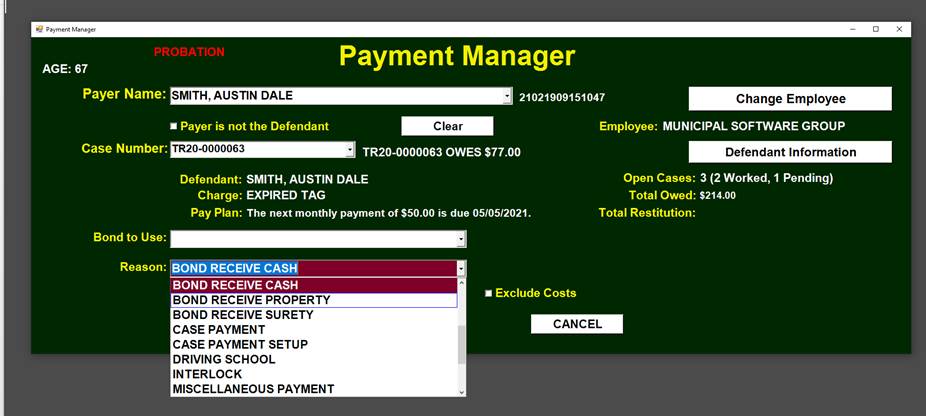
Navigating to the Profiles table
-
Click 'OK'

Clicking the 'OK' button
The Receive Bond Screen will appear.
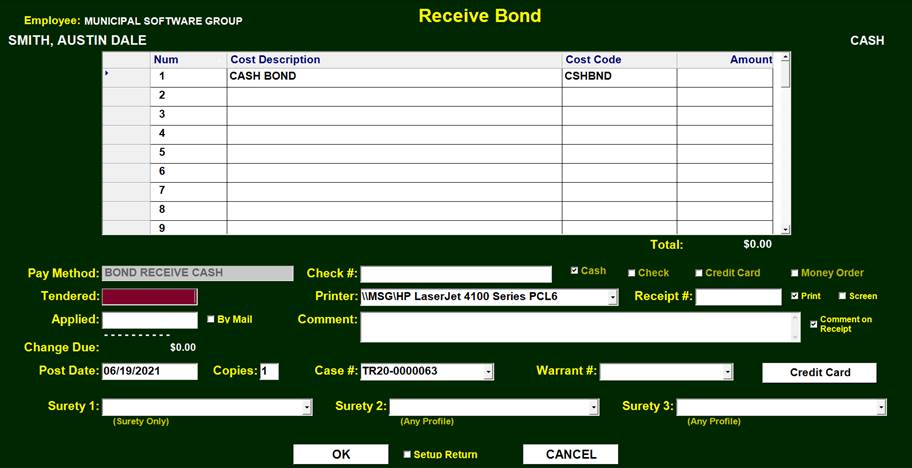
The Receive Bond Screen
If this Defendant had a Bond Amount from a Warrant, that amount would be prefilled into the ‘Tendered’ field.
Otherwise, Enter the amount of the Cash Bond in the ‘Tendered’ field.

The Receive Bond Screen
This amount will be automatically placed in the Applied and Cash Bond fields.
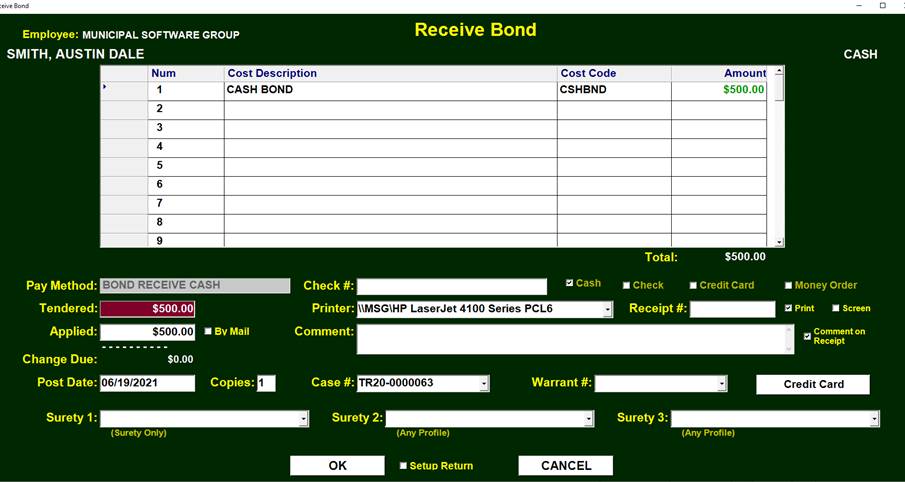
The Receive Bond Screen
-
Click ‘OK’ to generate a Cash Bond Receipt.

Clicking 'OK'
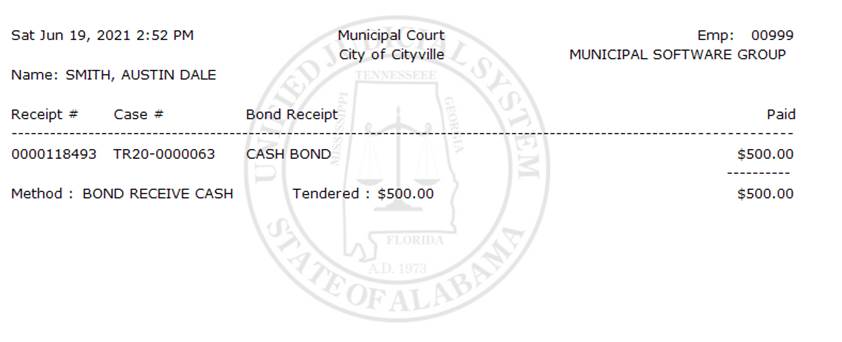
The Cash Bond Receipt
The Cash Bond of $500.00 is now attached to this Defendant and Case. It may be viewed by clicking on the ‘History Book’ and then the Bonds tab.
The 'History Book' icon
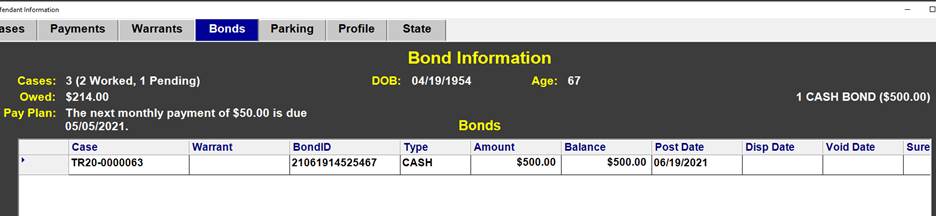
Bond information attached to case
Any Cash Bond with a Balance may also be viewed on the Payment Manager screen.
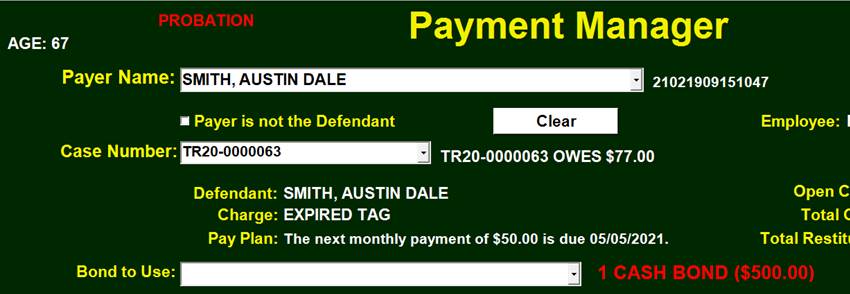
Notice the Cash Bond amount in red on the bottom right
The total of all Cash Bonds taken will show up on the end of day Total Receipts Report so that it may be deposited into the Cash Bond Account.
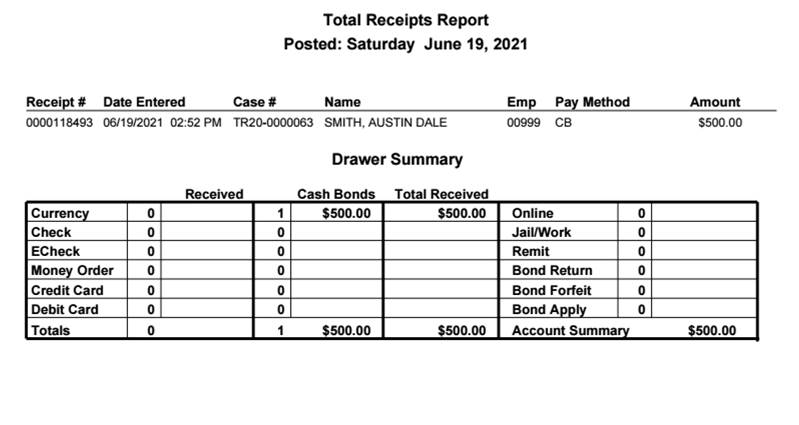
A Total Receipts Report showing the Cash Bond amount
Applying a Cash Bond
Cash Bonds taken on a Defendant may be later applied to any of that Defendant’s Cases through the Payment Manager.
Steps
-
Go to the Case on which the Bond is to be applied and Click on the Payment Manager icon.
The Payment Icon
-
Change the Reason to ‘BOND DISPOSE APPLY’.
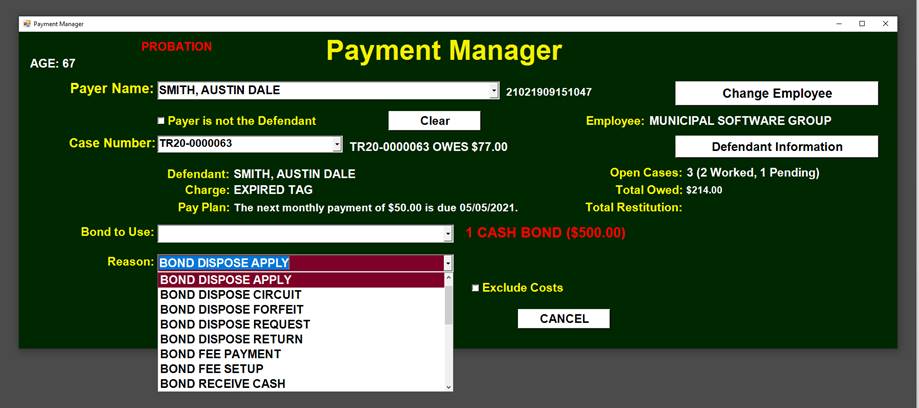
Changing the Bond Reason
-
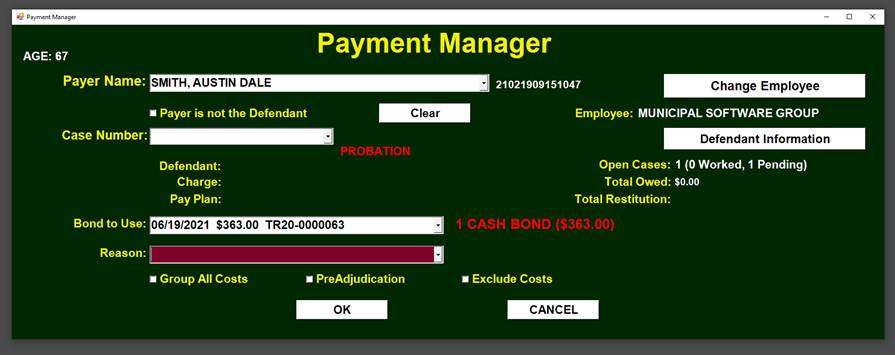
Select the ‘Bond to Use’. There may be many Cash Bonds from which to select. Here there is only one.

Selecting the Bond to use
-
Click on ‘OK’ to bring up the Case Payment Screen.
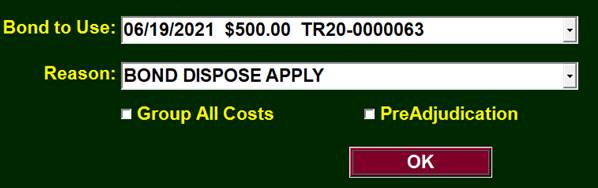
Clicking 'OK'
-
Enter the Amount of the Bond to Apply and Click ‘OK’
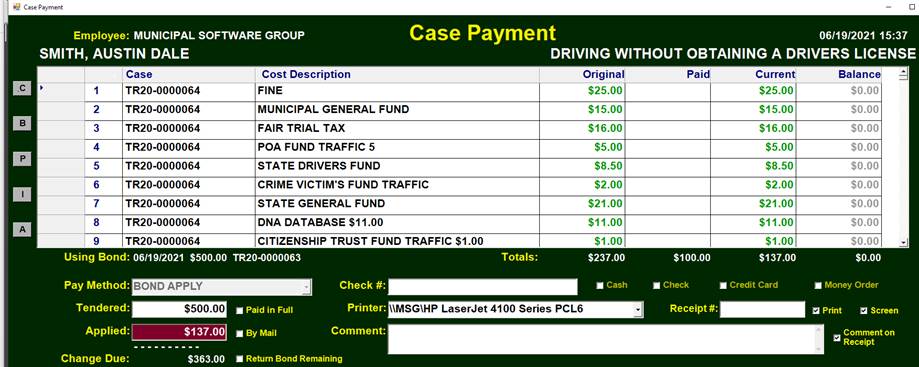
Entering Bond amount to apply
The Printed Receipt shows the Remaining Balance of $363.00
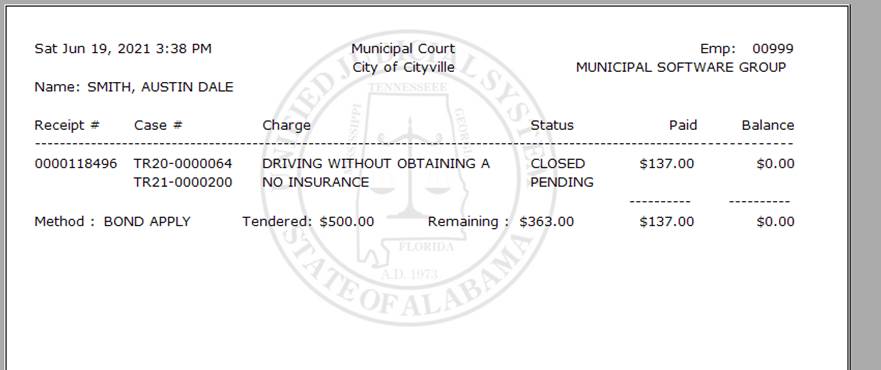
The Receipt
The Payment Manager Screen also shows the Remaining Balance.
The remaining balance shown on the Payment Manager
The Bond Apply amount will show up on the end of day ‘Total Receipts Report’ in the last column. This is not an amount that is being turned in for this day. Instead, it is amount that is to be distributed from the Bond Account.
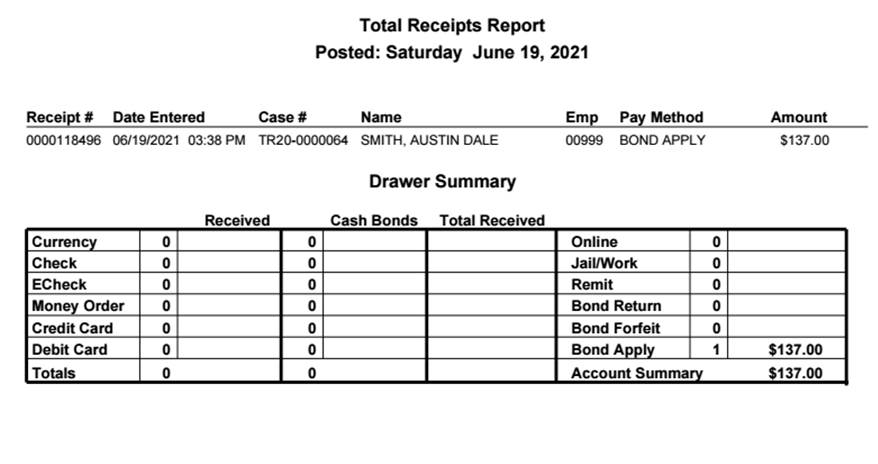
The Total Receipts Report showing the total amount to be distributed.
Returning a Cash Bond
Cash Bonds taken on a Defendant may later be fully or partially returned to the Defendant through the Payment Manager.
Steps
-
Go to the Case on which the Bond is to be applied and Click on the Payment Manager icon.
The Payment Icon
-
Change the Reason to ‘BOND DISPOSE RETURN’.
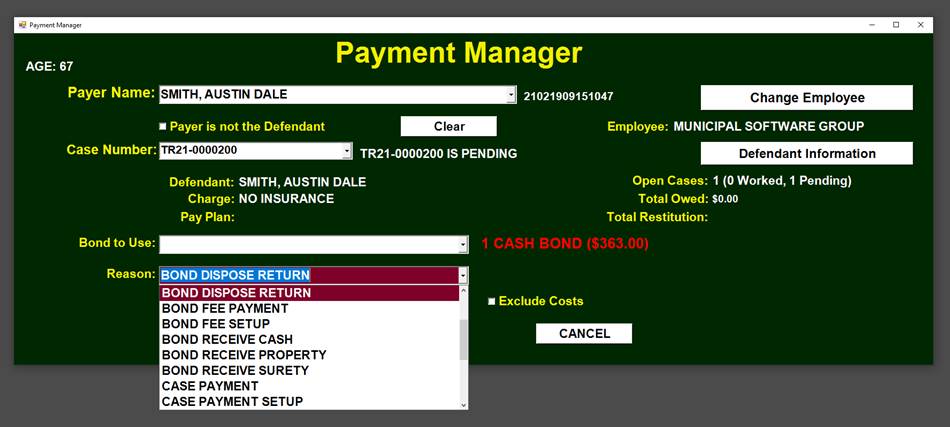
Changing the Bond Reason
-
Select the correct Bond as ‘Bond to Use’.
Selecting the Bond to use
-
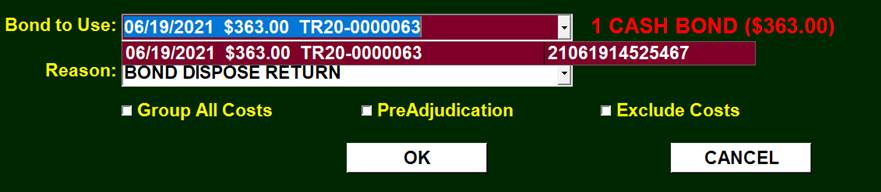
Click on 'OK'.
-
On the Bond Dispose Screen change the amount to return if necessary and Click 'OK'.
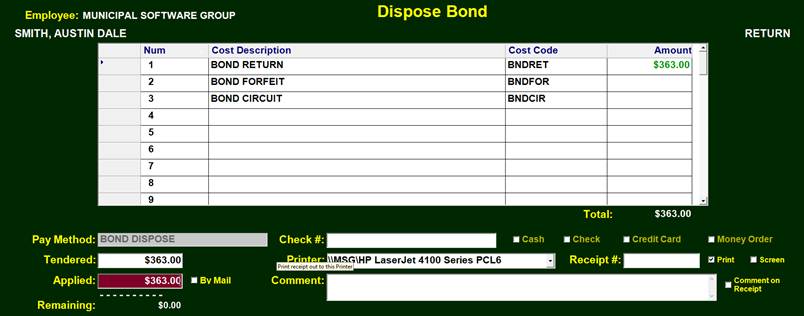
Entering Bond amount to return
The Printed Receipt shows that there is no longer a Balance Remaining.
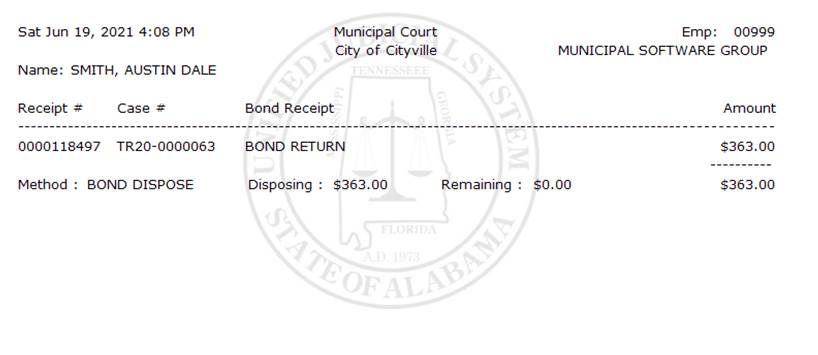
The Receipt
The Bond will now show on the Bond Return Report with an option to generate a letter.
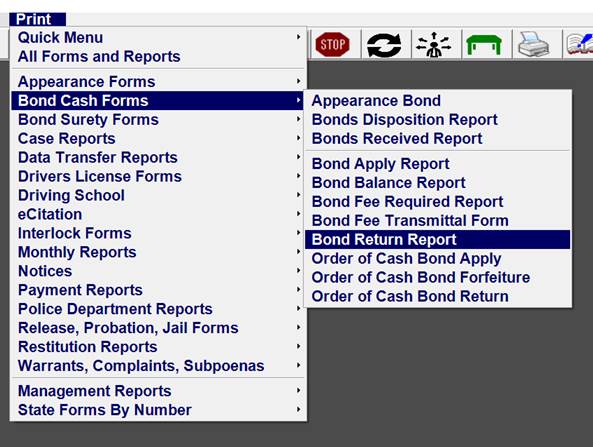
Navigating to the Bond Return Report screen
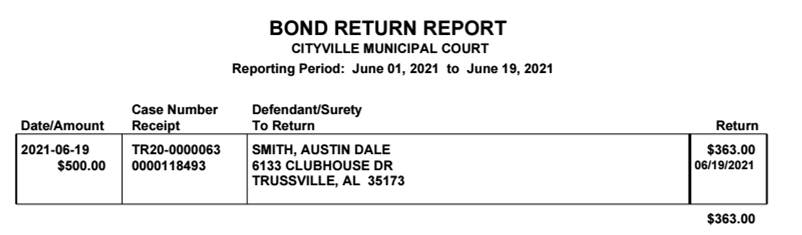
The Bond Return Report
Checking the ‘One Payee Per Page’ will produce a letter to the Defendant.
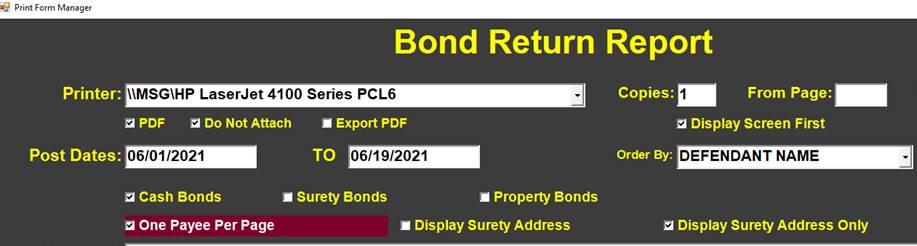
Highlighted: One Payee Per Page checkbox
The letter may be folded on the dotted line to fit into a Windowed Envelope.
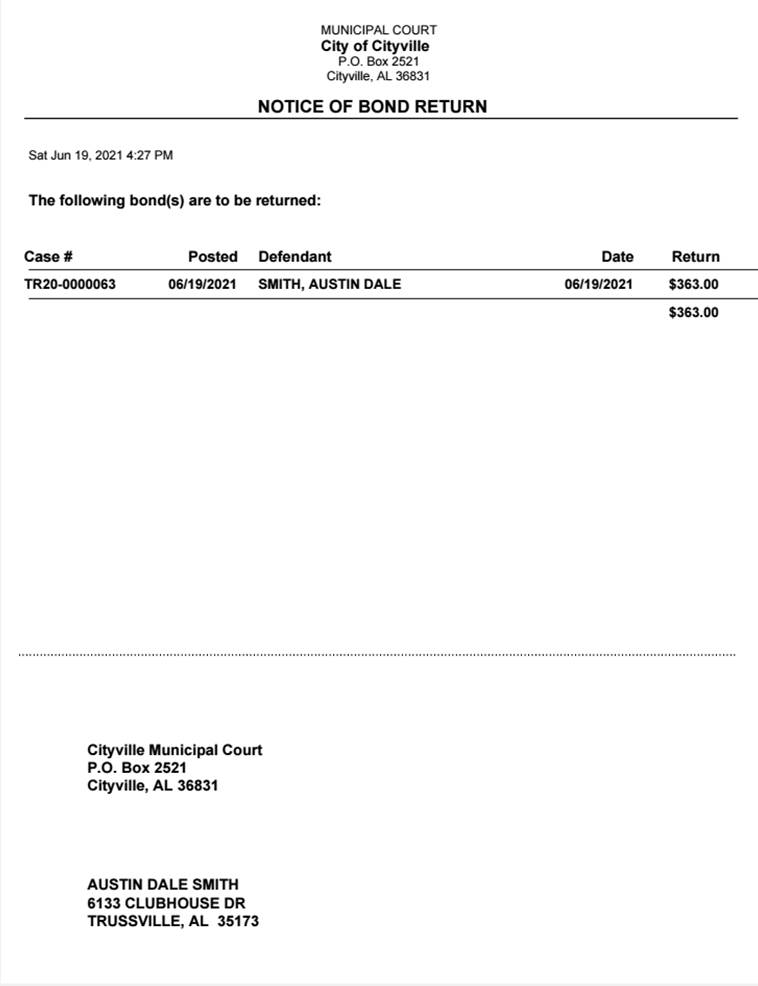
The letter for sending to Defendents
Forfeiting a Cash Bond
Cash Bonds taken on a Defendant may be later applied to any of that Defendant’s Cases through the Payment Manager.
Steps
-
Go to a Case for the Defendant from which the Bond is to be forfeited and Click on the Payment Manager icon.
The Payment Icon
-
Change the Reason to ‘BOND DISPOSE FORFEIT’.
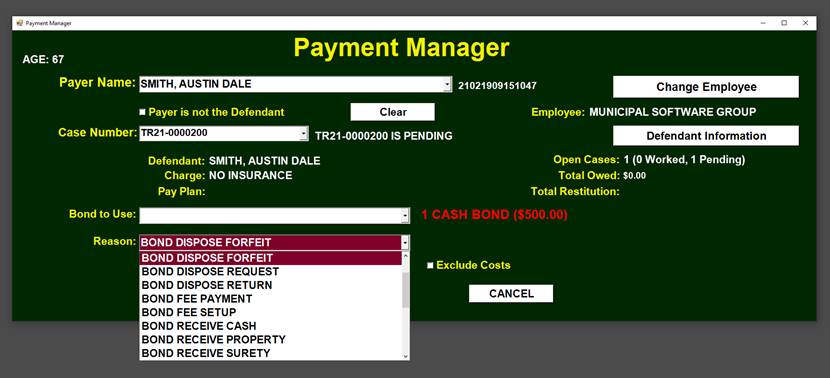
Changing the Bond Reason
-
Select the correct Bond as ‘Bond to Use’.
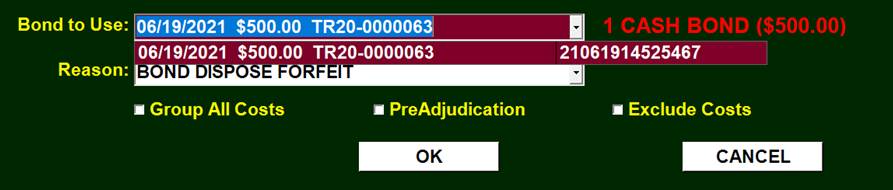
Selecting the Bond to use
-
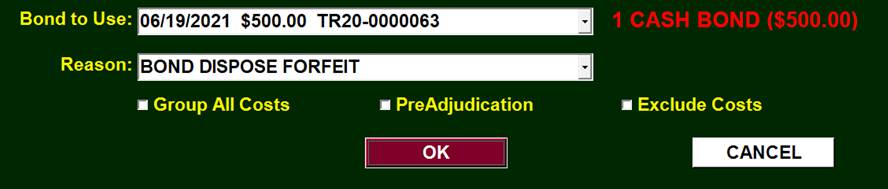
Click on 'OK'.
-
On the Bond Dispose Screen confirm the correct amount and Click OK.
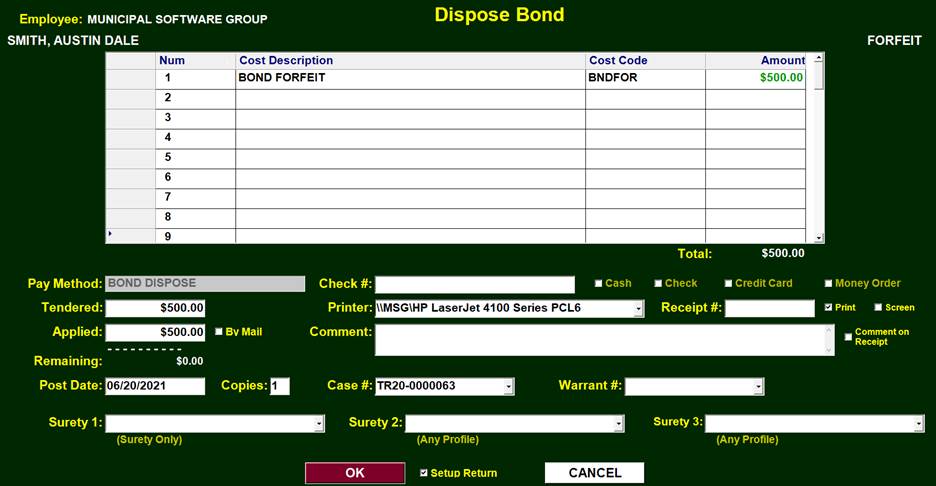
Dispose Bond screen
The Bond Forfeiture Receipt is then Printed.
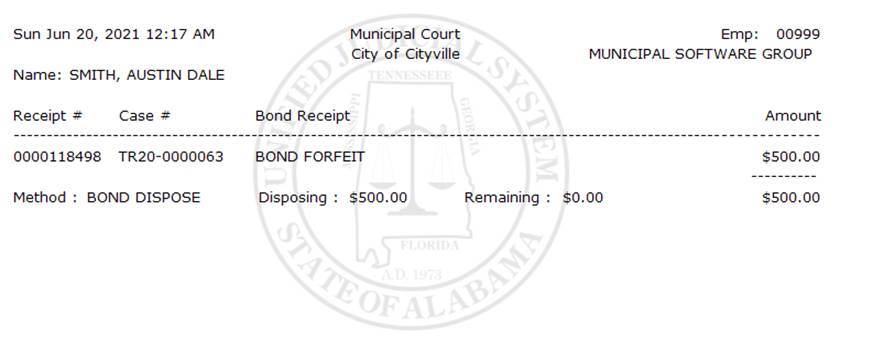
The Receipt
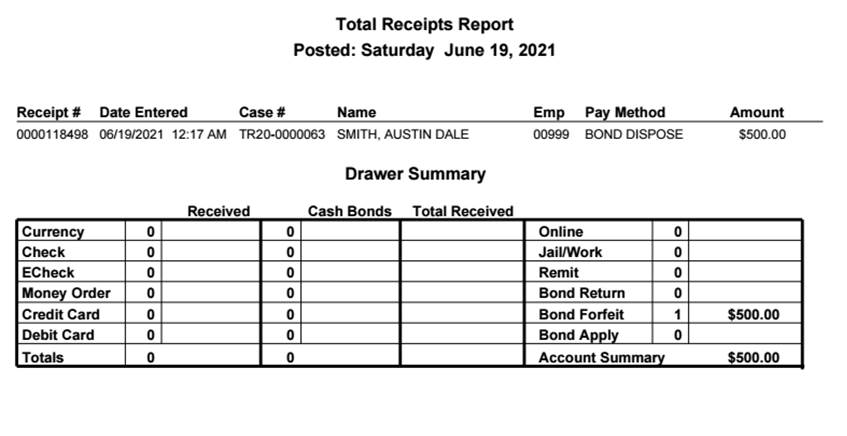
The Bond Forfeit amount will show up on the end of day ‘Total Receipts Report’ in the last column. This is not an amount that is being turned in for this day. Instead, it is amount that is to be distributed from the Bond Account.
Bond Return Report will list all Bonds to be returned.
The Total Receipts Report showing the Bond Forfeit amount